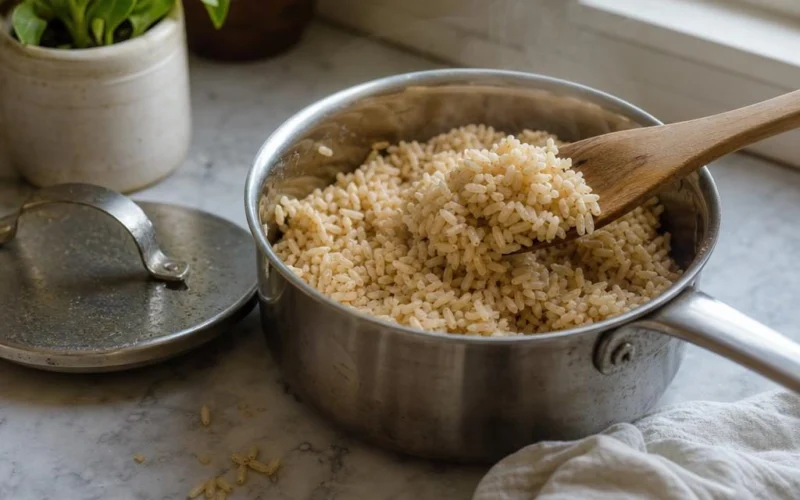
For 1 cup of standard long-grain brown rice, start with 2 cups of water on the stove and simmer it covered for about 40–45 minutes, then let it rest for 10 minutes. In a rice cooker, use the Brown Rice line; if there is no Brown setting, start with about 1½ rice-cooker cups of water per rice-cooker cup of rice. In an electric pressure cooker, start with about 1¼ cups of water and use a model-appropriate brown-rice setting or approximately 20–25 minutes at high pressure followed by a full natural release.
These are starting points, not universal formulas. Rice variety, soaking, cookware, measuring cups, and appliance design can all change the water needed and the brown rice cooking time. A rice-cooker cup is also not necessarily the same size as a standard U.S. measuring cup.
Brown Rice Water Ratios and Cooking Times at a Glance
| Method | Starting ratio for 1 cup rice | Active cooking time | Rest or release time | Approximate total time | Key note |
|---|---|---|---|---|---|
| Stovetop | 1 U.S. cup rice + 2 U.S. cups water | 40–45 minutes | 10 minutes, covered | 50–55 minutes | Use the lowest steady simmer. |
| Rice cooker with Brown setting | Use the Brown Rice water line | Programmed cycle | Follow appliance instructions | Varies by model | Use the supplied cup if the manual requires it. |
| Rice cooker without Brown setting | About 1 rice-cooker cup rice + 1½ rice-cooker cups water | Programmed cycle | Brief rest if directed | Varies by model | A 30-minute soak may help. |
| Electric pressure cooker | 1 U.S. cup rice + 1¼ U.S. cups water | About 20–25 minutes at high pressure | Full natural release | Often 45–60+ minutes | Pressure build-up and release add time. |
Package directions and appliance manuals take priority when they differ from these starting ratios. For example, rice cooker makers may specify a particular measuring cup and a marked water line; Zojirushi’s brown rice guidance directs users to use the cooker’s Brown Rice line when available.
How to Cook Brown Rice on the Stove
No-soak stovetop method
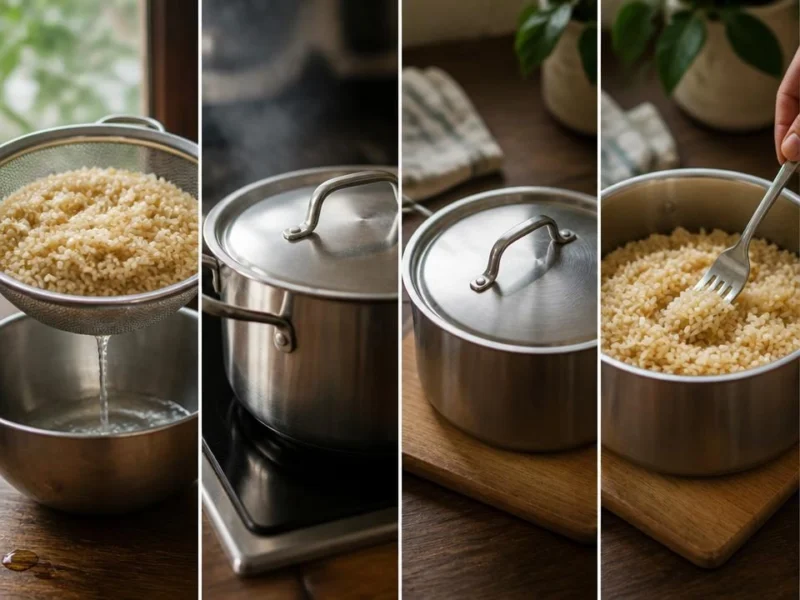
- Measure 1 cup standard long-grain brown rice and 2 cups water.
- Rinse the rice in a fine-mesh strainer under cool water until the runoff is less cloudy. Drain well.
- Add the rice and water to a heavy-bottomed pot with a tight-fitting lid. Bring to a boil over medium-high heat.
- As soon as the water boils, reduce the heat to the lowest steady simmer.
- Cover tightly and cook for 40–45 minutes. Do not stir or repeatedly lift the lid.
- Remove the pot from the heat and leave it covered for 10 minutes.
- Open the lid and fluff gently with a fork before serving.
A heavy-bottomed pot helps spread heat more evenly and lowers the chance of a scorched bottom. The goal is a quiet simmer, not a vigorous boil that drives off water too quickly or tosses the grains around.
The 2:1 stovetop ratio is a useful baseline supported by Utah State University Extension guidance, but it is not a ratio to transfer automatically to a pressure cooker or every rice cooker.
Soaking is optional. It can shorten stovetop cooking time, but it also changes how much water the rice needs. If you soak brown rice, follow a recipe written specifically for soaked rice rather than applying the full no-soak time. Illinois Extension’s soaked brown rice instructions, for example, use a substantially shorter stovetop cook time.
How to Cook Brown Rice in a Rice Cooker
Rice cooker with a Brown Rice setting
- Rinse the brown rice and drain it well.
- Use the cooker’s supplied cup if its manual calls for one. Do not assume it equals a standard 8-fluid-ounce U.S. cup.
- Add the rice to the inner pot and fill with water to the matching Brown Rice line.
- Select the Brown Rice program and keep the lid closed until the cycle ends.
- Let the rice stand as directed by the manufacturer, then fluff it gently with a fork or rice paddle.
The marked Brown Rice line is usually more useful than a generic ratio because it accounts for the cooker’s pot shape and programmed cycle. Avoid opening the lid mid-cycle unless the appliance manual tells you to do so.
Rice cooker without a Brown Rice setting
- Rinse and drain the rice.
- Start with about 1½ rice-cooker cups of water for every rice-cooker cup of brown rice.
- Consider soaking the rinsed rice for about 30 minutes before starting the cycle.
- Use the regular cycle only if the manufacturer permits it for brown rice.
- Assess the finished rice and adjust only one variable on the next batch.
This 1:1½ approach is based on guidance for compatible conventional cookers from Zojirushi, not a universal rule for every appliance. Your cooker’s manual and water markings are the final reference.
How to Cook Brown Rice in an Electric Pressure Cooker
- Rinse 1 cup of unsoaked standard brown rice and add it to the cooker with about 1¼ cups water. Treat this as a starting ratio for testing, not a universal pressure-cooker formula.
- Check your model’s manual and cooking charts first. Use the appliance’s Brown Rice program when available; model-specific ratios, programs, and release instructions take priority.
- If your manual permits manual high-pressure cooking and does not provide different guidance, begin with an approximate 20–25 minutes for unsoaked standard brown rice.
- Allow a full natural release unless your appliance instructions specify otherwise.
- Open the lid, fluff gently, and let the rice sit for a minute or two if it seems steamy or moist on the surface.
A sealed pressure cooker loses little water to evaporation, so it generally needs less water than a stovetop pot. The displayed pressure-cook time is not the full cooking time: the appliance must come to pressure first, and natural release can add many minutes afterward.
Soaked brown rice requires substantially less pressure-cook time than unsoaked rice. For example, Illinois Extension uses 14 minutes at high pressure followed by a full natural release for soaked brown rice; do not apply the unsoaked 20–25-minute estimate to soaked rice. Check your model’s manual and cooking charts when they differ; Instant Pot support also directs users to model-specific manuals and time tables.
The Fluffy Brown Rice Technique
- Rinse rice before cooking to remove some loose surface starch.
- Use the measuring cup and water ratio appropriate to the method.
- Do not stir after the rice starts cooking.
- Keep stovetop rice at a gentle simmer rather than a hard boil.
- Keep the lid closed so steam can finish cooking the grains.
- Rest rice before opening the lid or fluffing.
- Fluff with a fork instead of pressing or mashing the grains.
- For the next batch, change only water, soaking, or cooking time—not several variables together.
Fluffy does not mean every grain must separate completely. Short- and medium-grain brown rice are naturally more cohesive than long-grain brown rice, even when cooked correctly. For a looser, more separate texture, standard long-grain brown rice is usually the easiest starting choice.
How to Fix Crunchy, Wet, Sticky, or Scorched Brown Rice
| Problem | Likely cause | Immediate fix | Adjustment for next time |
|---|---|---|---|
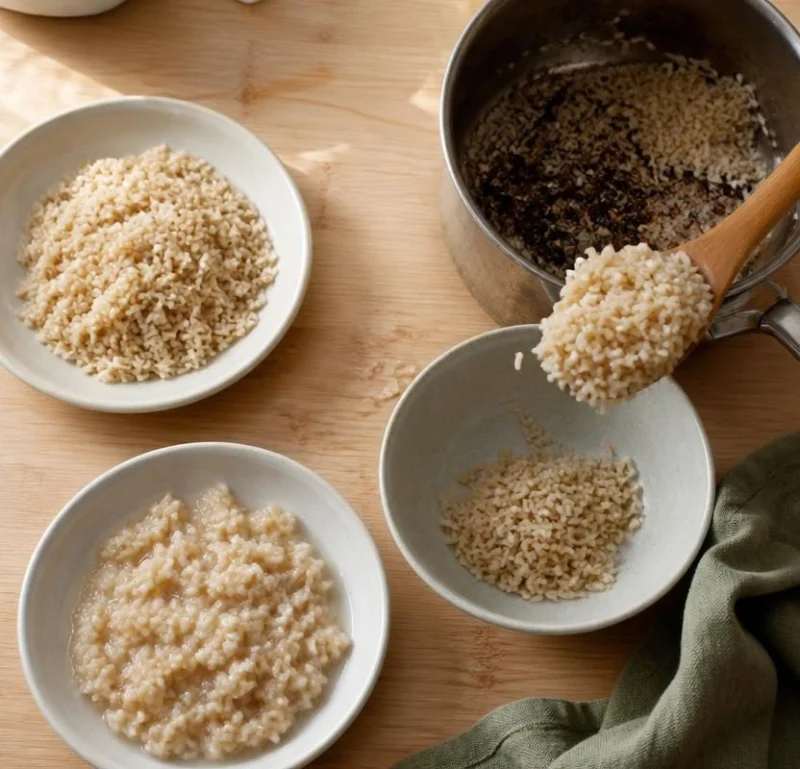
| Crunchy or hard | Too little water, too little time, or heat too low | Add 1–2 tablespoons water, cover, and cook 5–10 minutes more. Rest again. | Increase water slightly or extend cook time—do not do both first. |
| Wet | Too much water or too little evaporation | Leave covered off heat for 10 minutes. If still wet, spread briefly on a tray to release steam. | Reduce water slightly. |
| Sticky | Excess moisture, stirring, limited rinsing, or a cohesive variety | Spread gently to release steam; avoid aggressive mixing. | Rinse well, reduce water slightly, and avoid stirring. |
| Scorched bottom | Heat too high, thin cookware, or too little water | Transfer unburned rice to a bowl without scraping the bottom. | Lower the heat, use a heavier pot, and verify the ratio. |
| Unevenly cooked | Uneven simmer, poor lid seal, or inconsistent measuring | Rest covered first; do not immediately add a large amount of water. | Use level measurements and maintain a low, steady simmer. |
Adjustments for Rice Variety, Soaking, and Batch Size
Long-grain brown rice: Use the ratios above as your baseline for fluffy brown rice.
Brown basmati and brown jasmine: Their grain shape and brand-specific processing can change water needs and timing. Use the standard ratio only as a first reference, then check the package directions before making changes.
Short- and medium-grain brown rice: Expect a more clustered texture. Cohesive rice is not automatically overcooked or improperly cooked.
Quick-cooking or parboiled brown rice: Follow the package instructions. These products are processed differently and should not use standard whole-grain brown rice timing by default.
Soaked brown rice: Soaking can shorten cooking time and alter water needs, especially under pressure. Use a soaked-rice recipe rather than simply reducing the cooking time in an unsoaked method.
Larger batches: You can generally multiply rice and water proportionally, but stay within your rice cooker’s or pressure cooker’s marked capacity. Do not overfill an appliance just because the water ratio looks correct.
Common Questions About Cooking Brown Rice
Why does brown rice need less water in a pressure cooker than on the stove?
A pressure cooker is sealed, so very little water escapes as steam. Stovetop rice needs more starting water to account for evaporation during its longer simmer. The exact pressure-cooker ratio still depends on the appliance and rice type, so use the manual when it gives different instructions.
Can brown basmati, brown jasmine, and short-grain brown rice use the same ratio?
They can use the standard ratio as an initial reference, but they may not finish identically. Grain shape, variety, brand, and package directions can require changes. Short- and medium-grain brown rice may remain naturally more cohesive, while quick-cooking brown rice should always follow its package directions.
If the rice is close but not right, adjust only one variable next time: add a tablespoon or two of water for firm rice, reduce the water slightly for consistently wet rice, or extend the covered rest before changing the cooking time. For appliance-specific settings or unusual rice varieties, use the manufacturer’s instructions as the final reference.