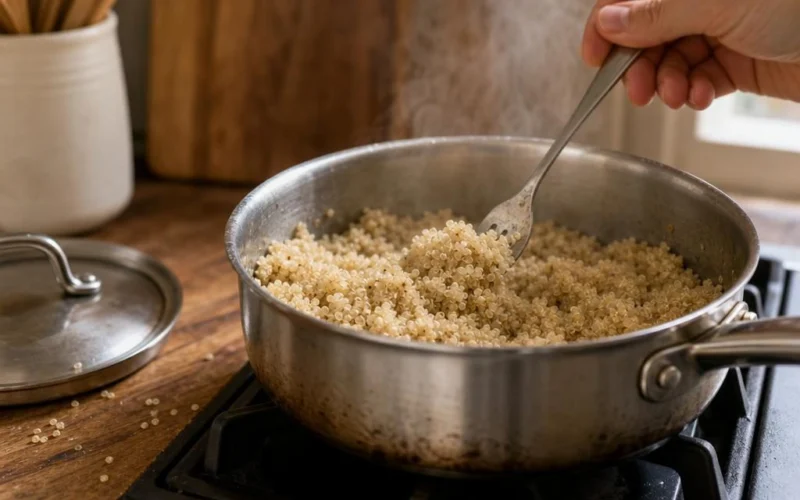
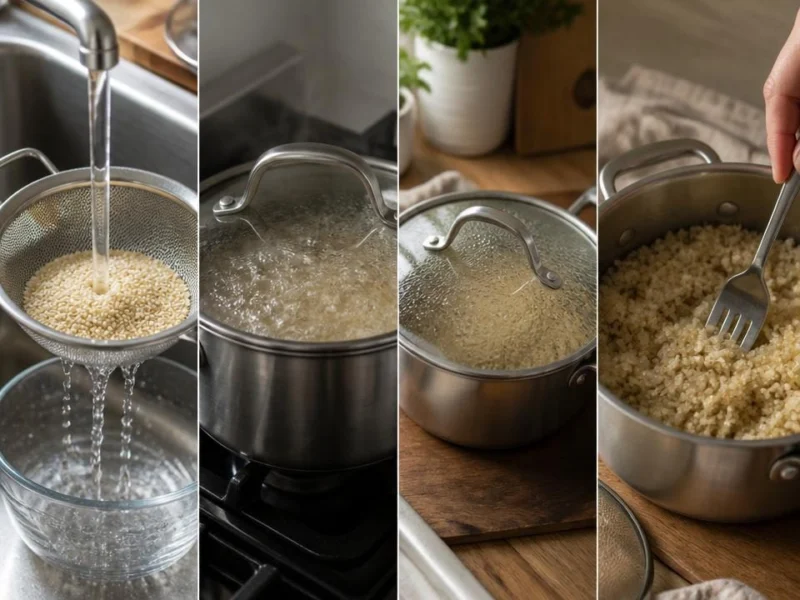
For fluffy quinoa, rinse 1 cup of dry quinoa in a fine-mesh sieve and drain it very well. Cook it with 1¾ cups of water or broth at a gentle covered simmer for about 15 minutes, then remove it from the heat, keep it covered for 5 minutes, and fluff it with a fork.
The quinoa is ready when the liquid has been absorbed, the grains are tender, and most of them show a small spiral-shaped germ or “tail.”
How to Cook Quinoa So It Is Fluffy
This stovetop method is designed to produce separate, light grains without leaving excess water in the pan. One cup of dry quinoa usually makes about 3 cups cooked, although the yield varies with the quinoa, liquid, and cooking vessel.
Ingredients and Equipment
- 1 cup dry quinoa
- 1¾ cups water or broth
- Optional: ¼–½ teaspoon salt
- Optional: 1 teaspoon oil
- Fine-mesh sieve
- Medium saucepan with a well-fitting lid
- Fork
The Stovetop Method
- Rinse the quinoa. Place it in a fine-mesh sieve and rinse under cool running water for about 30 seconds. Rinsing helps reduce surface bitterness from naturally occurring saponins. Pre-washed quinoa may already have reduced surface bitterness, but a brief rinse is still useful if you are sensitive to a bitter or soapy flavor.
- Drain thoroughly. Shake the sieve several times and let excess water run off. Water left clinging to the quinoa increases the effective liquid ratio, which can make the finished grains wet or mushy.
- Combine the ingredients. Put the well-drained quinoa, measured water or broth, and optional salt or oil into a medium saucepan.
- Bring to a boil. Heat the uncovered saucepan until the liquid reaches a full boil.
- Cover and simmer. Put on the lid, reduce the heat to low, and maintain a gentle simmer for about 15 minutes. Avoid frequent stirring; the grains can cook evenly without it, and leaving the pot undisturbed makes the process easier to monitor.
- Check the grains. Look for absorbed liquid and tender quinoa. If a small spoonful still has a hard center or the bottom of the pan contains a little liquid, cook for another 1–3 minutes.
- Rest covered. Remove the saucepan from the heat and leave it covered for 5 minutes. Do not skip this step if you want a fluffy texture.
- Fluff gently. Remove the lid and separate the grains with a fork. Lift and loosen them rather than stirring aggressively.
For a deeper flavor, you can toast the well-drained quinoa in the dry saucepan or in a teaspoon of oil before adding the liquid. Toast until it smells nutty, then add the water or broth carefully. Toasting can improve flavor, but it is not a guaranteed way to remove bitterness.
How to Tell When Quinoa Is Done
Quinoa cooking time is a useful guide, not a complete doneness test. A narrow saucepan, a wide pan, a loose lid, a large batch, high altitude, or a different quinoa color can all change how quickly the liquid is absorbed. White, red, and black quinoa may also remain slightly different in appearance and firmness.
- Liquid absorbed: There is no liquid pooling in the bottom of the pan.
- Grains tender: The quinoa is soft enough to chew but is not collapsing into a paste.
- Spiral germ visible: Most grains have opened and show a small spiral or curved “tail.”
- Light texture: The grains look separate rather than wet, compact, or paste-like.
- No hard center: A small test spoonful has no firm, chalky center.
If the liquid is gone but the grains are still crunchy, the heat may have been too high, the lid may have allowed steam to escape, or the quinoa may need a little more liquid. If the grains are tender but liquid remains, do not keep boiling them indefinitely; use the troubleshooting steps below.
Why the Resting Step Makes Quinoa Fluffier
The covered rest lets residual steam finish absorbing into the grains after the heat is turned off. It also gives surface moisture time to redistribute, so the quinoa separates more easily when you fluff it.
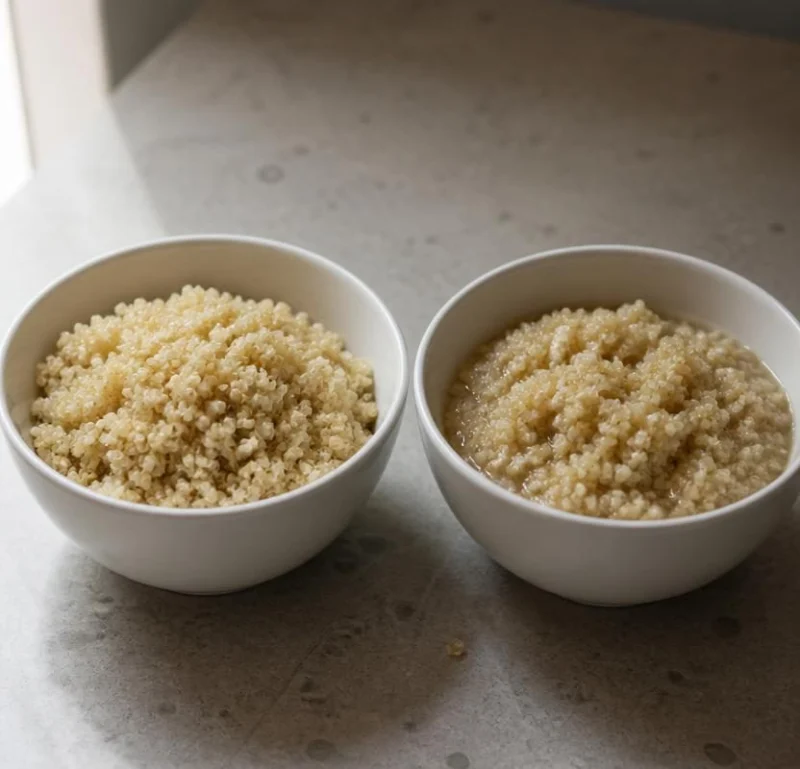
Keeping the lid on during these 5 minutes matters. Removing it immediately allows steam to escape before it has finished working through the cooked grains.
Troubleshooting Quinoa Texture and Flavor
“Mushy,” “wet,” and “crunchy” are different problems, so they need different fixes. Identify whether the grains are overhydrated, undercooked, or simply holding excess liquid before changing the method.
| Symptom | Likely cause | Best next step |
|---|---|---|
| Mushy or clumpy | Too much liquid, poorly drained quinoa, vigorous cooking, or overcooking | Spread it on a plate or shallow tray to release steam. Use it in patties, fritters, porridge, or a mixed-grain dish. Reduce the liquid next time. |
| Wet with liquid still in the pan | Heat was too low, the lid was loose, the pan was too small or wide, or the batch needs more time | Simmer uncovered for 1–3 minutes, watching closely. If the grains are already tender, drain the excess liquid instead of continuing to cook. |
| Crunchy or hard in the center | Insufficient liquid, heat that was too high, a leaking lid, or too little cooking time | Add 2–4 tablespoons of hot water. Cover and cook on low for 3–5 minutes, then rest covered for another 5 minutes. |
| Bitter or soapy | Surface saponins were not sufficiently reduced, or the quinoa has a naturally noticeable flavor | Rinse more thoroughly before cooking. Use broth, salt, or aromatics for flavor. Do not assume toasting alone will remove bitterness. |
| Fluffy on top but wet underneath | Uneven heat, an oversized batch, or insufficient resting | Stir only after cooking. Return the pan briefly to low heat if needed, then rest covered. Use a wider pan or smaller batch next time. |
| Quinoa sticks to the pan | Heat was too high or the pan was too dry | Lower the heat and avoid prolonged cooking after the liquid disappears. A small amount of oil can improve serving texture. |
If You Used a Different Ratio
Many package directions and recipes use 2 cups of liquid for every 1 cup of quinoa. This article starts with 1¾ cups because a slightly lower amount can help limit excess moisture when the quinoa is rinsed and drained carefully. Both ratios can work, but neither is universal for every brand, pan, or lid.
Use a 1:2 ratio when the quinoa brand consistently remains firm, the lid is loose, the cooking vessel loses a noticeable amount of steam, or you prefer a softer result. Follow the package directions when they substantially differ, especially for pre-rinsed, instant, quick-cooking, or unusually processed quinoa.
Pan width also affects the result. A very wide pan exposes more surface area, which can increase evaporation, while a small, deep pan may retain more steam. A large batch may need extra time and more careful checking than the one-cup method. At higher altitudes, boiling and evaporation can behave differently, so the package instructions may be the better starting point.
Small Adjustments for Better Flavor and Texture
- Use broth: Replace some or all of the water with low-sodium broth for a more savory base.
- Salt the liquid: Adding salt at the beginning seasons the quinoa more evenly than salting only after cooking.
- Toast the grains: Toast well-drained quinoa in a dry saucepan or with a small amount of oil for a nuttier flavor. Treat this as a flavor step, not a guaranteed bitterness fix.
- Limit stirring: Repeated stirring is unnecessary during a covered simmer and can disturb an even cooking process. This is a practical technique preference, not a proven rule that stirring alone causes mushiness.
- Check the package: Pre-rinsed, instant, quick-cooking, and specially processed quinoa may require different liquid amounts or cooking times.
Storing Cooked Quinoa
For leftovers, transfer the cooked quinoa to a shallow container so it cools more efficiently, and refrigerate it within 2 hours. Keep the refrigerator at 40°F or below, consistent with guidance from FoodSafety.gov.
Use refrigerated cooked quinoa within 3–4 days, following USDA FSIS guidance for cooked leftovers. Reheat only the portion you need, adding a small splash of water if the grains have dried out.