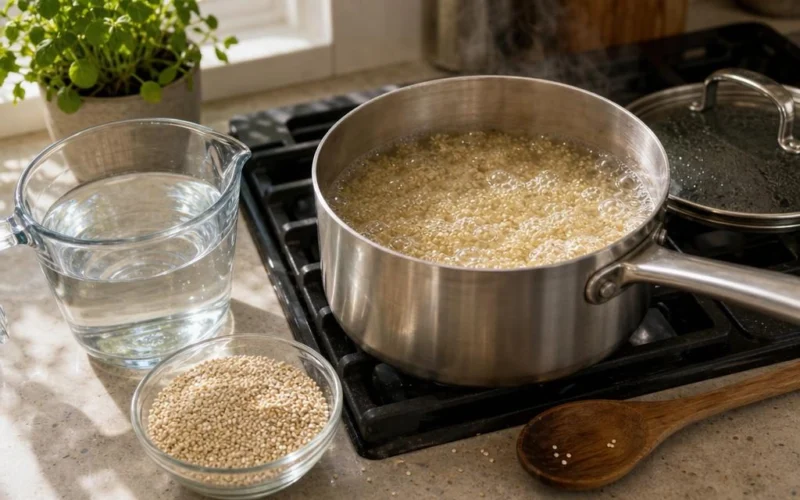
Use 1 cup dry quinoa to 2 cups water or broth for the most forgiving stovetop ratio. Bring it to a boil, cover, reduce the heat to low, and simmer for about 12–15 minutes; then let it rest, still covered, for 5–10 minutes before fluffing.
For firmer, less-moist quinoa, 1 cup quinoa to 1¾ cups liquid can work well in a saucepan with a snug lid and controlled evaporation. But 1:2 is the safer place to start, especially with an unfamiliar pan.
The Best Quinoa Water Ratio for Stovetop Cooking
The dependable quinoa water ratio is 1 part dry quinoa to 2 parts liquid. That means 1 cup quinoa needs 2 cups water, vegetable broth, chicken broth, or another cooking liquid.
This 1:2 formula is widely used because it allows enough liquid for the quinoa to soften and absorb moisture without needing constant attention. OSU Extension’s stovetop quinoa guidance uses this ratio, along with a short covered simmer and resting period.
Why do published quinoa cooking ratios differ? The final texture is affected by evaporation, pan width, lid fit, quinoa variety, and how thoroughly the quinoa was drained after rinsing. A wide pan or loose lid can lose more steam than a narrow, well-covered saucepan.
Myth: quinoa must always use one exact ratio. In practice, 1:2 is a reliable default, while 1:1¾ is a useful texture variation rather than a competing universal rule.
Quinoa-to-Liquid Ratios by Batch Size
The table below scales both the standard 1:2 quinoa cooking ratio and the firmer 1:1¾ option. Cooked yield is approximate and can vary by variety, moisture loss, and final texture.
| Dry quinoa | Liquid at 1:2 | Liquid at 1:1¾ | Approximate cooked yield |
|---|---|---|---|
| ½ cup | 1 cup | ⅞ cup | About 1½ cups |
| 1 cup | 2 cups | 1¾ cups | About 3 cups |
| 1½ cups | 3 cups | 2⅝ cups | About 4½ cups |
| 2 cups | 4 cups | 3½ cups | About 6 cups |
If you are measuring broth from a carton, the 1:2 version is usually easiest to use. For the 1:1¾ option, ⅞ cup is just under 1 cup; for a small ½-cup batch, using a scant 1 cup of liquid is usually practical.
How to Cook Quinoa on the Stovetop
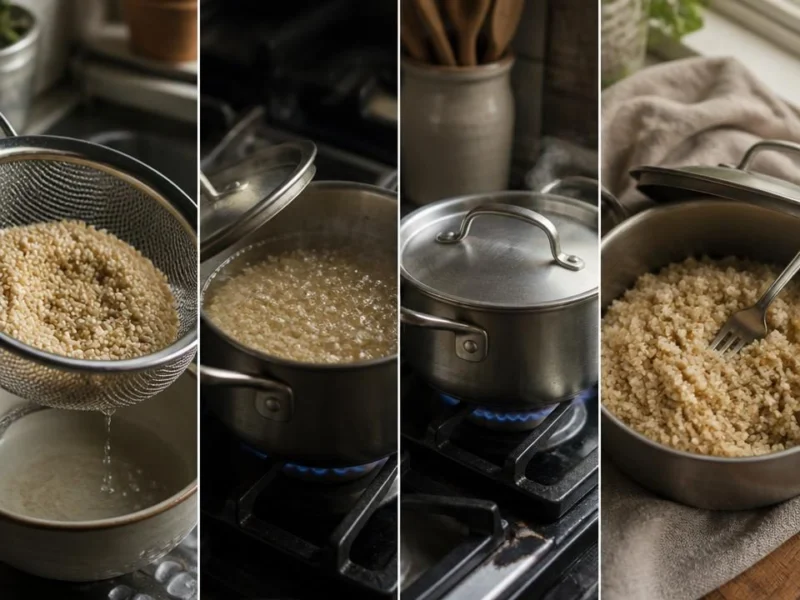
-
Rinse and drain the quinoa. Place the dry quinoa in a fine-mesh strainer and rinse under cool running water. Drain it thoroughly before cooking. If the package says the quinoa is pre-rinsed, an additional rinse is optional rather than mandatory; follow the package directions when they differ.
-
Combine quinoa and liquid in a saucepan. Add the rinsed, well-drained quinoa and water or broth to a saucepan with a lid. For the standard method, use 2 cups liquid per 1 cup quinoa.
-
Boil, cover, reduce, and simmer. Bring the liquid to a boil over medium-high heat. Once boiling, cover the pan, reduce the heat to low, and simmer for approximately 12–15 minutes. Avoid repeatedly lifting the lid, since escaping steam changes the cooking environment. Treat the timer as a guide: before turning off the heat, check that the liquid is absorbed and the quinoa is tender, especially when cooking darker varieties or at higher elevations.
-
Rest covered, then fluff. Turn off the heat when the liquid has been absorbed and the quinoa is tender. Leave the lid on for 5–10 minutes, then fluff gently with a fork. This covered rest is part of the method, not an optional extra.
A cooked quinoa grain often shows a small, pale spiral-like germ tail. It is a useful visual clue, but not absolute proof that every grain is perfectly tender. Check for absorbed liquid and a tender bite instead. Do not use tasting raw quinoa as a doneness or safety test.
- Liquid is mostly absorbed.
- There is no standing water in the pan.
- Quinoa is tender rather than hard or gritty.
- The germ may be visible on some grains.
- The quinoa has rested before fluffing.
How Rinsing, Pan Width, and Resting Change the Result
Rinsing and Drainage
Rinsing quinoa can reduce surface compounds associated with bitterness. It does not guarantee that all bitterness disappears, and flavor can also vary by brand and variety.
Rinsed quinoa does not usually need a major change to the water ratio. The important detail is drainage: water left clinging to poorly drained quinoa becomes extra moisture in the pan, which can make the finished quinoa softer. Let it drain well in a fine-mesh strainer before measuring your cooking liquid.
Pan Width and Lid Fit
A wide, shallow pan exposes more surface area, so liquid can evaporate faster than it would in a narrower saucepan. A lid that does not fit snugly can have a similar effect, allowing too much steam to escape during the simmer.
Rather than automatically adding extra water, use a saucepan with a close-fitting lid and check for tenderness near the end of the cooking time. If your pan is especially wide or the lid is loose, quinoa may need a few extra covered minutes or a small splash of liquid to finish.
Resting Before Fluffing
The 5–10 minute covered rest lets remaining moisture redistribute through the quinoa. Fluffing immediately after the simmer can release steam too quickly and leave the texture uneven or wetter in some areas.
After resting, use a fork rather than a spoon to separate the grains gently. This helps preserve a lighter, fluffier texture.
Troubleshooting Quinoa Texture Problems
| Problem | Likely cause | Fix |
|---|---|---|
| Crunchy quinoa | Too little absorbed liquid, low heat, or cooking stopped too soon | Add a small splash of water, cover, and cook on low for a few more minutes |
| Watery or soupy quinoa | Too much liquid, poor drainage, or a weak simmer | Drain carefully if needed; return to low heat uncovered briefly |
| Mushy quinoa | Excess liquid, overcooking, or too much retained rinse water | Spread it out to release steam; use less liquid and improve drainage or lid control next time |
| Scorched bottom | Heat too high or the pan ran dry before quinoa was tender | Transfer unburned quinoa to a clean pan without scraping the bottom; if undercooked, finish gently with a little liquid and a lid |
| Bitter flavor | Surface bitterness or a naturally stronger flavor | Rinse thoroughly before cooking; use broth or season after cooking |
| Unevenly cooked quinoa | Loose lid, uneven heat, or insufficient rest | Cover, rest longer, and finish gently with a little liquid if needed |
If quinoa is crunchy: add a small splash of water or broth, cover the pan, and cook on low for several more minutes. Rest it again before checking. More water is not a universal fix for undercooking—adding a large amount can leave the quinoa wet or mushy.
If there is excess liquid: carefully drain it if necessary, then return the quinoa to the pan over low heat, uncovered, just long enough to evaporate lingering moisture. Watch closely so the bottom does not scorch.
If the bottom is scorched: transfer the unburned quinoa to a clean saucepan or bowl without scraping the bottom of the original pan. If it remains undercooked, finish it gently in a clean pan with a small amount of liquid and a lid.
If quinoa is mushy: spread it on a plate or baking sheet for a few minutes to release steam. For future batches, use less liquid, drain rinsed quinoa more thoroughly, and keep the lid snug to better control moisture.
Adjustments for Quinoa Variety and High Altitude
Red, Black, and Tri-Color Quinoa
Red, black, and tri-color quinoa can generally start with the same 1:2 liquid ratio. Darker or mixed varieties may take somewhat longer to soften than white quinoa, so use the timer as a guide rather than a rigid endpoint.
Look for absorbed liquid and a tender texture. If the liquid is gone but the grains are still firm, add a small splash of water, cover, and continue cooking gently.
High-Altitude Cooking
At elevations around 3,000 feet and above, water boils at a lower temperature, so foods cooked in simmering water may take longer to soften. CSU Extension’s high-elevation guidance explains that longer cooking is often needed for this reason.
Altitude mainly changes cooking time and evaporation behavior; it does not automatically require a radically different quinoa ratio. Keep the pan covered, check tenderness later than usual, and add a small amount of liquid if the pan dries out before the quinoa is tender.
CSU Extension offers an example of adding about 2 extra minutes of cooking time per 1,000 feet of elevation for some foods, but treat that as a starting point rather than a guarantee. Pan shape, lid fit, burner strength, and the quinoa itself still matter.
Ratio Decision Rule
Choose 1 cup quinoa to 2 cups liquid when you want a reliable, forgiving batch or are using an unfamiliar pan. Try 1 cup quinoa to 1¾ cups liquid when you prefer firmer, less-moist quinoa and can control evaporation with a well-covered saucepan.
If quinoa is crunchy, extend covered cooking with a small amount of liquid. If it is watery, evaporate or carefully drain the excess moisture rather than automatically increasing cooking time.